
A continuous air barrier at window interfaces is key for building performance. It seals the building to stop uncontrolled air leaks. This affects energy costs, comfort, and how long the building lasts.
Where is this most important? For high-performance buildings, of course. It also matters for older buildings with existing air leak problems. Pay close attention to window air sealing in any climate with big temperature changes.
How do you do it? Create a continuous plane. Compare options for installing new windows with practical tips on sealing, insulation, and alignment.. Use sealant, tapes, or liquid membranes to connect the window frame, wall air barrier, and the opening in the wall. Clean and dry surfaces are a must for good adhesion.
Watch out for sealant gaps, using the wrong materials (some sealants don't work with certain membranes), and forgetting the corners. Even a small gap ruins everything.
What if you mess up? Expect higher energy use from heating and cooling losses, uncomfortable drafts, and moisture that causes mold. This can damage the building. You'll see higher bills, complaints, and costly repairs. Doing it right saves money later.

Air barriers are key to managing airflow through a building's walls, roof, and floors. They act like a shield, stopping conditioned air from escaping and outside air from entering. This improves energy use, air quality, and comfort for people inside.
Interior air barriers go on the inside of a building. Drywall with sealed seams, plastic sheeting, and spray membranes are common choices. They are easier to install and fix than outside barriers, especially when updating older buildings.
When should you focus on keeping interior air barriers sealed around windows? Always, but especially when renovating or fixing drafts. Seal the space between the window frame and the wall using foam, sealant, or special tapes.
A common mistake is skipping surface prep before sealing. Dust and moisture can weaken the seal, causing leaks later. Another mistake is using the wrong sealant. It must work with both the window frame and wall, and stay flexible.
Without a good air barrier, energy bills will rise from air leaks. You might also feel drafts and cold spots. Moisture can build up in the walls, leading to mold and damage. Getting it wrong costs money, comfort, and health.
Window-to-wall connections are tough spots for keeping air out. These areas get tricky because different materials meet there, and each one expands or shrinks at its own rate. Also, construction isn't always perfect. Small errors in size can mess up the seal. Even if things are just a little off, air can leak through, wasting energy and possibly causing dampness inside the walls. If you ignore these spots, you're asking for trouble with how the building holds up over time.
It's common for window frames (made of things like plastic, metal, or wood) to not work well with the wall covering or air barrier. Sealants or tapes might not stick to both surfaces the way they should. Then, when the temperature changes, the different materials move differently, which can break the seal and leave gaps. To prevent this, pick materials that are made to go together. Check to be sure they work well together. Also, make sure the surface is ready before you put on any sealant or tape.
To get a good, lasting seal, you have to put it on carefully. Use enough sealant to fill all the spaces, but don't use too much. Smooth it out so it sticks to both surfaces. The shape of the space where you put the sealant matters too. Narrow, deep spaces are usually better than wide, shallow ones. Check the work regularly while you're building to catch any mistakes before they get covered up.
If window connections aren't sealed right, air will leak in and out. This makes heating and cooling cost more because air you've paid to heat or cool escapes, and outside air comes in. Air leaks can also bring in dampness, which can cause mold and damage the walls. Also, drafts and uneven temperatures make people uncomfortable. So, fixing air leaks at window connections is key to making buildings last and saving energy.
If you don't seal window connections well, bad things happen. Energy costs go up, the air inside gets worse, and the building doesn't last as long because of dampness. Fixing the problem later, like resealing or replacing windows, is expensive and a hassle. It's cheaper to use good materials and do the job right the first time. Check the work carefully to make sure window installations are airtight and will last.
Air leaks around windows cause more than just drafts. They hurt your budget and your team. First, expect higher energy bills. Poorly sealed windows let air escape, which makes your HVAC system work harder. This is especially true in older buildings or those with single-pane windows. The result? Higher utility costs.
Drafts also make people uncomfortable. Unpleasant workspaces near windows distract employees. They'll spend more time trying to get comfortable and less time focusing. Here's the fix: Make sure windows are sealed well when installed or replaced. A continuous barrier around the window frame will stop these problems.
But there's more. Air leaks bring moisture. Warm, humid air gets into walls, condenses, and causes mold and rot. This damages the building and leads to expensive repairs. Even worse, mold spores make the air unhealthy. Employees with allergies or asthma will suffer, which means more sick days and less work getting done.
What are the common mistakes? Skipping sealant, using the wrong kind, or not connecting the window flashing to the wall air barrier. If the barrier isn't continuous, you're leaving a hole in your building. The result? All the problems we've discussed, plus damage from moisture. If you get it wrong, you'll pay for it through energy costs, repairs, and lost work time.
Air barriers do more than save energy. They stop moisture and keep indoor air clean. Building codes now require continuous air barriers, especially around windows. This prevents drafts, mold, and structural damage.
This applies to new buildings and big renovations where you open walls. The goal is a continuous, air-tight layer. Seal the window frame to the wall using tapes, sealants, or both. Pick materials that work with the window, wall, and climate.
What are the common mistakes? Using the wrong materials, leaving gaps, and not connecting the window air barrier to the wall air barrier. The result? Leaks, moisture, and building failure.
Test with blower doors to check air tightness. Use infrared to find leaks, especially around windows. If you skip the air barrier at windows, expect higher bills, discomfort, and costly repairs. Getting this right pays off.
To seal windows properly, think about the whole system. Don't just add caulk at the end. We want to stop air leaks that waste energy, cause drafts, and lead to moisture and mold issues.
The goal is a continuous air barrier that connects the window frame to the wall's air barrier. This often means using flexible flashing tapes to seal the window flange to the sheathing outside. Then, use sealant or expanding foam inside to connect the window frame to the interior air barrier (often drywall).
Pick the right materials. They must be compatible, durable, and able to move without breaking their seal. Acrylic or butyl-based sealants usually work well, but check the data sheets. Expanding foam can also work, but don't use too much. It can bend the window frame.
Installation matters. Surfaces must be clean and dry for tapes and sealants to stick. Fill all gaps. One common mistake is skipping air sealing between the window frame and the rough opening before adding the interior finish. If you skip this, air leaks into the wall. This causes drafts, higher bills, and possible moisture damage. Fixing it later means removing interior finishes.
Picking the right air barrier for your windows does more than save energy. It also stops moisture damage and keeps your indoor air healthy over time. Mess this up, and you could get mold, rot, and uncomfortable rooms, which all lead to costly repairs.
When should you focus on this? New buildings, of course. Also, focus on this when you replace windows, especially in older buildings. Don't assume the old air barrier still works.
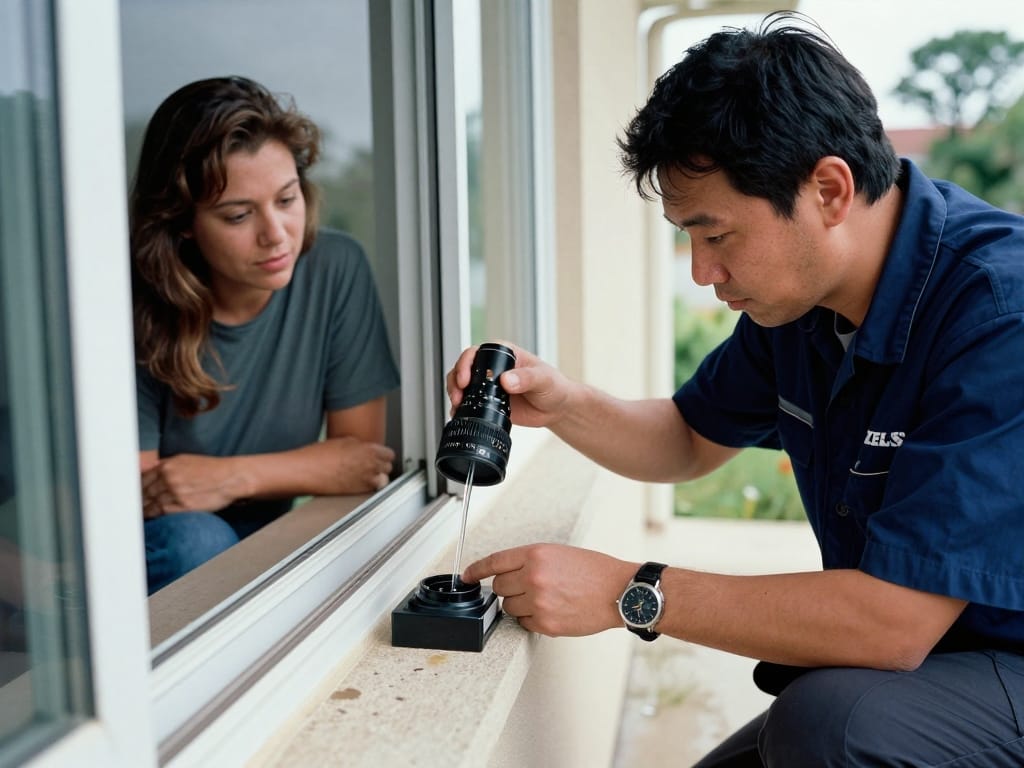
How do you do it? First, clean the frame and wall around it very well. Then, pick from fluid membranes, tapes, or expanding foams. Fluid membranes work well but need certain temperatures and humidity when you put them on. Tapes are faster, but you must prep the surface for them to stick. Use a primer if recommended. Expanding foams are easy to use, but they can expand too much and bend window frames if you aren't careful. Use a low-expansion foam made for windows.
What are some common mistakes? Gaps in the air barrier, using the wrong materials, and skipping surface prep. Also, not bridging the gap between the window frame and the wall air barrier is a big mistake. If the air barrier isn't continuous, air and moisture will get in.
What goes wrong? If the materials don't stick well, you get air leaks. Materials that don't bend crack when the building moves. The wrong materials can break each other down over time. The result? Drafts, higher bills, and water damage that could cost a lot to fix. Choose carefully.

Here's that section:
Sealing windows correctly is key to a good air barrier. Air leaks around windows waste energy, cause discomfort, and can lead to moisture problems. Address this when you first install windows or replace them in an existing building.
First, prep the surface. The window opening must be clean and dry. Remove loose debris, dirt, and old sealant. Wipe it down with a damp cloth, then dry it. Next, apply a continuous line of high-quality sealant to the surface. Make sure the sealant works with both the window frame and the wall. Don't use cheap sealant; it will crack.
When you set the window, press it firmly into the sealant to create a good seal. After you fasten the window, apply more sealant to the inside and outside gaps. Smooth it out to ensure full contact. Many installers skip this, leaving gaps that let in air and water. This is a mistake.
Finally, check your work. After the sealant cures, look for cracks or gaps. Use a smoke pencil or blower door test to find air leaks. If you find any, add more sealant right away. If you skip this, expect higher energy bills, drafty rooms, and mold. It's a small cost that pays off.
Windows often leak air. Why is this a problem? Air leaks raise energy costs, reduce comfort, and cause moisture problems that lead to mold. For example, those drafts employees feel near windows? That's often air leakage, and it costs money.
So, what goes wrong? Surface prep matters. If the window frame isn't clean and dry, the sealant won't stick. Dust, debris, and moisture ruin adhesion, which creates gaps over time.
Sealant application also matters. Too little sealant creates gaps. Even with enough sealant, installers sometimes fail to bridge the gap between the window frame and the wall. You need a continuous, tooled bead to create a seal. Gaps cause leaks.
What happens when it's done wrong? Heating and cooling bills go up. Also, condensation can form within the wall, which leads to mold. Mold is a much bigger problem to fix because it involves remediation and health concerns. Fixing these details upfront costs less than fixing cascading problems later.
Want to know if your window air barriers work? Test them. Here are three ways: blower door tests, infrared thermography, and smoke testing.
Blower door tests lower the air pressure inside. A big fan pulls air out, and sensors measure incoming air. This tells you how much air leaks. Higher numbers mean more leaks and bigger problems. This could mean air barrier failures at the windows or elsewhere, but it's a start.
Infrared thermography uses a thermal camera to spot temperature differences. In cold weather, leaking cold air shows up as cooler areas near windows. For best results, test when it's much colder outside than inside. Note: Surface condensation can look like an air leak.
Smoke testing uses a smoke puffer to find air leaks. Slightly change the air pressure inside and puff smoke around windows. If the smoke is sucked in or blown out, you've found a leak. This works well for finding specific problems, but it's hard to see in bright light or wind.
You need experience to understand these results. One test rarely tells the whole story. Fixing leaks might mean re-caulking or adding sealant. Bad leaks might mean replacing the window. Ignoring leaks leads to higher energy bills, drafts, and possible wall damage from moisture.
Windows often leak air in older buildings. Why is this a problem? Leaks cause drafts, uneven temperatures, and higher energy bills, which hurt employee comfort and productivity. Uncomfortable employees near leaky windows may not work as well.
When should you fix leaky windows? During window replacement projects, of course. Also, check for leaks if you get comfort complaints or high energy bills, especially in older buildings.
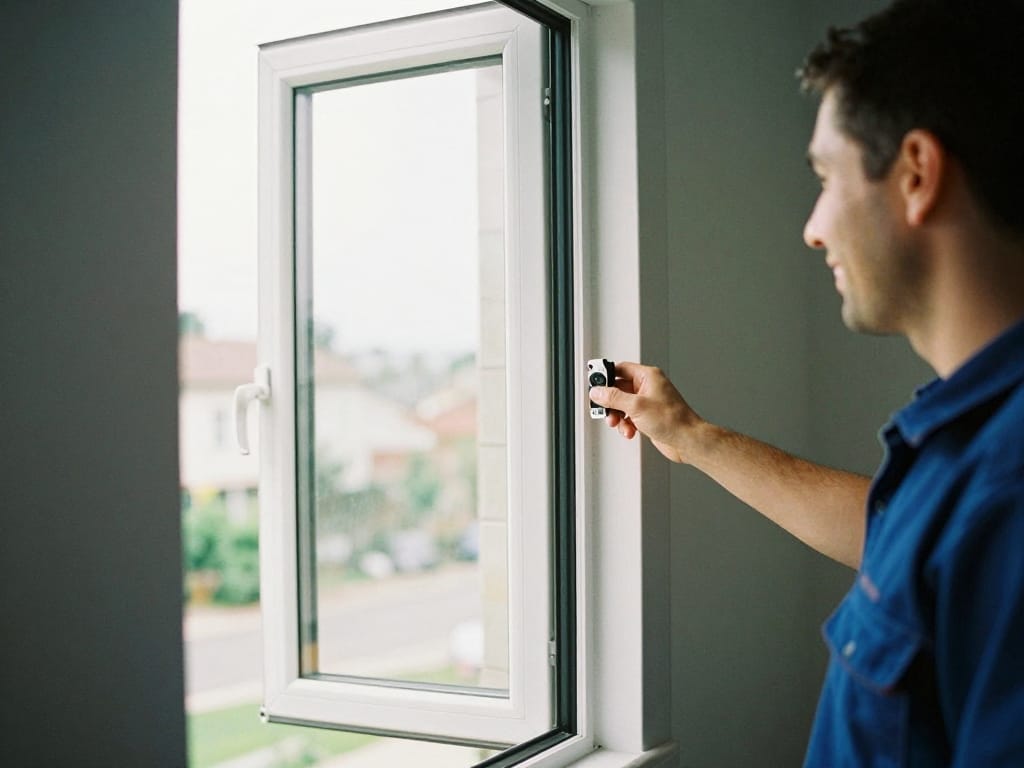
How do you fix it? Make sure the window frame connects to the wall's air barrier. First, remove interior trim to expose the gap between the window frame and the wall. Then, fill the gap with low-expansion foam (high-expansion foam can bend the frame). Next, apply sealant that works with both the window frame and wall. Use backer rod to control the sealant depth.
What are some common mistakes? Using too much foam can warp the window frame and cause problems. Also, skipping the sealant leaves the foam open to sun damage and future air leaks. A bad seal means drafts and wasted money. Sealant that doesn't work with the window or wall can also cause problems. If the window isn't airtight, the whole system fails.
Think long term. Good air sealing around windows does more than pass an energy audit. It saves your company money every year. Expect lower heating and cooling bills, plus happier, more productive employees. Drafty offices hurt morale and productivity. Sealing window air leaks is a great place to start.
When should you do this? Always for new buildings. Also, during renovations, especially when replacing windows. It's easier and cheaper to do it right the first time. Seal the gap between the window frame and the wall opening. Use expanding foam, backer rod, and good sealant. Don't buy cheap materials; they crack and fail.
The biggest mistake? Leaving gaps in the air barrier. Even small gaps let in air and moisture. This raises energy bills, grows mold, and damages the building. To calculate your return on investment (ROI), estimate your yearly energy savings (an energy audit helps). Then, add the cost of proper sealing and subtract the money you save on future repairs from moisture damage. Here's a simple formula: (Savings + Avoided Costs - Initial Investment) / Initial Investment. A payback period of five years or less is a good goal. Poor sealing leads to higher HVAC costs and health problems from mold, costing you more in the end.
Let's explore real-world examples and lessons learned about air barriers, focusing on what HR professionals need to know.
Windows can leak air, which impacts a building's energy bill and employee comfort. It's not just about caulking around the frame. You need a continuous air barrier where the window meets the wall's air barrier.
Consider a high-rise office building. If the air barrier isn't sealed at every window, you're creating holes that bleed energy. For example, a Chicago office tower retrofit used a fluid-applied membrane to seal window-to-wall connections. This cut air leakage by 30%, which saved money on HVAC and reduced complaints about cold spots.
Address this during construction or renovations. Common mistakes include skipping the detail, assuming the window installer will handle it (they usually don't), or using the wrong materials. If the air barrier fails at the window, expect higher energy use and mold growth from condensation, leading to higher maintenance costs. This problem is often hidden and ignored until it's expensive to fix. Pay attention to material compatibility and installation. Doing it right the first time saves money.
New tech is boosting air barrier performance at window areas beyond just caulk. Why does this matter? Leaky windows waste energy, let in moisture, and cause drafts. Fixing this early saves money and makes buildings last longer.
Vacuum Insulated Panels (VIPs) are appearing in energy-smart projects. Putting them around windows boosts insulation and cuts condensation. But VIPs break easily. Install them carefully. If you poke a hole, they fail.
Smart windows change with the sun. Their frames must seal tight to the wall's air barrier. This means using special seals tested to work with the window's electric parts.
Better sealants, like hybrid polymers and pre-compressed tapes, are also here. They stick better and last longer than caulk. But prep the surface first. If it's dirty, the sealant will fail, causing leaks and water damage. Use primer!
Don't assume the window guy will handle the air barrier. Spell it out and check it. If the air barrier doesn't connect to the window frame, air will leak. This raises energy costs and can cause mold inside the wall.
Sealing windows isn't just about stopping drafts. It affects the whole building. Leaky windows mean uncontrolled air leaks. This raises energy bills, strains the HVAC, and makes the temperature jump around for everyone inside. Do it right when you build or renovate. Waiting costs more.
How do you do it right? It's a system. Use the right stuff: sealant, flashing, and the air barrier itself. Install it perfectly. That means clean surfaces, enough sealant, and careful work in corners. The quality should be obvious.
What are the usual mistakes? Gaps in the sealant, using materials that don't last, and skipping the flashing. What happens if you mess up? Water gets in, which leads to mold, bad insulation, and damage to the building. If you skip air sealing, expect higher costs, health problems, and the building falling apart early. Don't skimp on this.
The Flemish Area (Dutch: Vlaams Gewest, articulated [ËŒ vlaËË ms x É™ ˈ Ê‹ É› st], normally simply referred to as Flanders (Dutch: Vlaanderen [ˈ vlaËË ndəə r É™(n )], is among the 3 areas of Belgium—-- along with the Walloon Area and the Brussels-Capital Region. Covering the northern section of the country, the Flemish Region is largely Dutch-speaking. With a location of 13,626 km2 (5,261 sq mi), it accounts for only 45% of Belgium's area, yet 58% of its population. It is just one of one of the most largely inhabited regions of Europe with around 500/km2 (1,300/ sq mi). The Flemish Area is distinct from the Flemish Area: the last incorporates both the occupants of the Flemish Area and the Dutch-speaking minority living in the Brussels-Capital Area. It surrounds the Netherlands and France.
.A home window is an opening in a wall, door, roof covering, or automobile that allows the exchange of light and might likewise allow the flow of audio and often air. Modern home windows are usually polished, or covered in a few other transparent or transparent product, a sash set in a structure in the opening. The sash and frame are additionally described as a home window. Numerous glazed home windows might be opened up, to allow ventilation, or closed to exclude stormy climate. Windows might have a lock or similar device to secure the window closed or to hold it open by different quantities. Kinds include the brow window, taken care of home windows, hexagonal home windows, single-hung, and double-hung sash home windows, horizontal moving sash windows, casement windows, awning home windows, hopper windows, tilt, and slide home windows (commonly door-sized), tilt and turn home windows, transom home windows, sidelight home windows, jalousie or louvered windows, clerestory windows, lancet home windows, skylights, roof covering windows, roofing system lanterns, bay home windows, oriel home windows, thermal, or Diocletian, home windows, image windows, climbed windows, fire escape windows, discolored glass windows, French windows, panel home windows, double/triple-paned home windows, and witch home windows.
.